Installing a Toilet Flange - Step-by-Step Guide for Correct Setup
Installing a Toilet Flange - Step-by-Step Guide for Correct Setup
Blog Article
We have stumbled upon this article relating to Fix a Broken Toilet Flange directly below on the web and decided it made good sense to share it with you in this article.
Introduction:
Understanding the Importance of a Toilet Flange:
In the realm of plumbing, the often-overlooked toilet flange plays a critical role in making certain the smooth operation of your bathroom components. Acting as an essential port between your commode and the underlying waste pipe, the commode flange works as the unrecognized hero of your plumbing system. Without this durable part, your bathroom would certainly be prone to instability and leaks, possibly resulting in expensive fixings and hassle. As a result, comprehending the significance of an appropriately set up and maintained toilet flange is paramount for any homeowner embarking on plumbing jobs or attending to fixing demands.
Why Proper Installation and Maintenance Matter:
Proper installation and thorough maintenance of the toilet flange are important for safeguarding the integrity of your plumbing infrastructure. A diligently set up flange not only anchors your toilet securely in position but likewise creates an impenetrable seal, warding off the perils of leaks and smells. By accepting a positive technique to flange upkeep, you can alleviate the danger of turbulent plumbing problems and preserve the serenity of your household setting. Throughout this insightful overview, we'll decipher the details of toilet flange installment and repair work, equipping you with the expertise and expertise to navigate these necessary jobs adeptly.
Ideal Practices When Installing a Toilet Flange:
Ensuring a smooth commode flange installation needs adherence to a collection of best techniques that ensure durability and performance. Begin by thoroughly examining your tools and materials, guaranteeing you have the needed devices for the task in advance. Choosing the ideal flange product, whether PVC, ABS, or cast iron, is critical, as it establishes the durability and efficiency of your plumbing component. In addition, evaluating existing plumbing conditions, such as checking for damage or corrosion, is vital for preemptively attending to potential problems and making sure a smooth installment procedure. By taking on these primary actions, you set a strong structure for an effective commode flange installment, reducing the probability of future issues and facilitating long-term maintenance.
Once effectively prepared, wage the careful removal of the old flange, adhering to an organized approach to stay clear of creating damages to bordering parts. Utilize techniques customized to resolve stubborn or rusted flanges, guaranteeing their swift and safe removal without endangering the integrity of the surrounding plumbing infrastructure. With the old flange got rid of, carefully mount the brand-new replacement flange, choosing one that fits comfortably and safely right into place. Correctly securing the flange to the flooring using screws or adhesive is important, as it guarantees security and stops future leakages. By adhering to these best methods during the setup process, you prepared for a robust and trustworthy toilet flange setup that holds up against the examination of time.
Installing a New Toilet Flange:
When setting up a new commode flange, the very first step is to select the appropriate substitute for your plumbing setup. Take into consideration variables such as the material of the flange, with choices consisting of PVC, ABS, or cast iron. PVC flanges are understood for their cost and resistance to deterioration, making them a preferred choice for DIY fanatics. Abdominal flanges supply similar benefits to PVC but boast added toughness, making them appropriate for high-traffic locations or business setups. Cast iron flanges, renowned for their toughness and longevity, are ideal for installations where durability is paramount. Additionally, guarantee that the replacement flange is properly sized and fits well into location to produce a water tight seal and protect against leaks.
Protecting the Flange to the Floor:
Once you've chosen the ideal substitute flange, it's essential to protect it properly to the flooring to ensure stability and protect against future concerns. Begin by positioning and lining up the flange properly over the drain, making sure that it sits flush with the flooring surface area. Depending on the kind of flange and your specific installation preferences, you can protect the flange to the floor making use of screws or adhesive. If using screws, make sure to use corrosion-resistant alternatives to stop rusting over time. Additionally, adhesive can give a protected bond between the flange and the flooring, guaranteeing a sturdy and reliable installment. By following these actions and taking the needed safety measures, you can mount a new toilet flange with confidence, guaranteeing a durable and leak-free plumbing fixture.
Ideal Practices When Repairing a Broken Flange:
Repairing a damaged commode flange needs meticulous interest to detail and adherence to best techniques to make certain a long-term solution. Begin by extensively examining the extent of the damage and determining the underlying cause, whether it be rust, cracks, or imbalance. This analysis will assist your fixing technique, enabling you to choose the most suitable strategies and products for recovering the flange to its optimal problem. Additionally, take into consideration the bordering plumbing facilities and floor security to attend to any type of potential adding factors and stop future issues from developing. By conducting a detailed evaluation and evaluation, you lay the groundwork for an efficient and long-lasting repair work process that solves the source of the trouble.
With a clear understanding of the flange's condition and the variables affecting its damage, proceed with the fixing process utilizing accuracy and treatment. Depending upon the extent of the damages, you might go with fixing methods such as epoxy putty, fixing flange packages, or partial flange substitutes. Ensure that the selected repair service approach efficiently addresses the specific problems at hand while preserving the architectural stability and functionality of the flange. Additionally, take aggressive actions to enhance the repaired flange and avoid future damage, such as applying sealant or waterproofing materials to protect against leakages and rust. By adhering to these best methods throughout the repair service procedure, you can restore your damaged flange to optimum condition, making sure the long-lasting reliability and performance of your plumbing system.
Kinds Of Toilet Flanges:
Understanding the different kinds of commode flanges is essential for choosing the most suitable choice for your plumbing requires. PVC, ABS, and cast iron are amongst the common products made use of in commode flange construction, each offering distinct advantages and considerations. PVC flanges, recognized for their cost and corrosion resistance, are favoured for their convenience of setup and toughness. ABS flanges, comparable to PVC in terms of affordability and simplicity of setup, are prized for their effectiveness and resistance to influences. On the other hand, cast iron flanges, renowned for their extraordinary toughness and longevity, are usually liked for high-traffic areas or commercial settings where longevity is extremely important. By familiarising yourself with the qualities of each material, you can make an informed decision when selecting a toilet flange that straightens with your particular demands and choices.
Along with material factors to consider, bathroom flanges likewise can be found in various styles and designs to fit various plumbing setups and installment preferences. Offset flanges, as an example, are designed to accommodate commodes set up on floors that are not level or where the drain lies off-centre. Likewise, fixing flanges, also known as repair service rings or spacer rings, are made use of to attend to problems such as cracked or broken flanges without the need for extensive plumbing modifications. Furthermore, flexible flanges supply flexibility ready, permitting precise placement and fit during setup. By exploring the varied series of bathroom flange types and styles offered, you can choose the alternative that best suits your plumbing arrangement and installation needs, making sure a smooth and dependable remedy for your shower room fixtures.
Specialty Options:
Along with standard commode flanges, there are specialty alternatives available to deal with specific plumbing obstacles and installation choices. One such choice is the offset flange, which is created to suit bathrooms mounted on floorings that are not level or where the drain lies off-centre. Offset flanges feature a distinct style that enables the bathroom to be positioned at a small angle, compensating for unequal floor covering or misaligned plumbing connections. This cutting-edge service ensures a secure and stable setup, getting rid of the need for costly and time-consuming floor leveling or pipe relocation. By including a balanced out flange right into your plumbing configuration, you can get rid of typical installation obstacles and attain a professional-quality result effortlessly.
One more specialized choice worth considering is the repair work flange, additionally called a repair service ring or spacer ring. Repair flanges are particularly made to attend to problems such as cracked or damaged commode flanges without the need for comprehensive plumbing alterations. These versatile elements can be set up straight over the existing flange, supplying a strong and reliable base for securing the toilet in place. Repair flanges come in different dimensions and setups to accommodate different flange diameters and installation requirements, making them a convenient and affordable service for resolving flange-related problems. Whether you're taking care of a minor flange repair work or an extra complicated plumbing concern, integrating specialty choices like countered and repair flanges can streamline the setup process and ensure long-lasting performance for your bathroom fixtures.
Final thought:
Finally, grasping the art of toilet flange setup and repair is necessary for keeping a practical and leak-free plumbing system in your house. By understanding the importance of an appropriately set up flange and adhering to finest techniques throughout the process, you can make certain the longevity and reliability of your shower room components. Whether you're selecting the right type of flange, conducting fixings, or exploring specialized choices, interest to detail and meticulous implementation are essential. Normal maintenance and proactive troubleshooting can assist avoid pricey plumbing problems and protect the peace of your family environment. Armed with the knowledge and abilities acquired from this extensive overview, you can tackle toilet flange setup and fixing with confidence, equipping you to secure your plumbing system for many years ahead.
How to Replace a Toilet Flange That’s Old or Broken
Turn Off the Water Supply
As with many other plumbing tasks, the first step is to turn off the water supply to the toilet so you don’t end up dealing with a messy leak. Look for the shut-off valve on the wall behind the toilet—typically located closer to the floor—and turn it all the way clockwise.
Empty the Toilet Bowl and Tank
Now, it’s time to drain the water remaining in the bowl and tank and confirm that the supply line is fully closed. Flush the toilet a few times until the bowl no longer fills with water. You can use a plunger to drain any small volume of water lingering at the bottom of the basin. If the tank continues to replenish the bowl after a few tries, you need to go back to step one and keep turning the knob on the water supply until it’s all the way off.
Disconnect the Water Supply
Set down towels or a tarp on the bathroom floor to keep it safe from the moderate water runoff that can happen while disassembling a toilet. Look for a hose, usually made of braided metal, that runs from the tank to the joint with the shutoff valve.
Loosen it at the end attached to the fill valve on the underside of the toilet. If you have trouble doing so by hand, try using an adjustable wrench. Expect a bit of water leakage when the hose disconnects.
Remove the Toilet Tank
Look for the two or three mounting bolts on the bottom of the tank that connect it to the bowl on each side. Using your wrench, loosen the nuts from the bolts and set them somewhere safe and accessible. Carefully lift the tank up and off the bowl and set it aside. Take some time to review the parts of a toilet as you get ready for the next step.
Remove the Toilet Bowl
Now comes the hardest part. Be prepared to lift the toilet bowl—typically weighing between 70 and 120 pounds—off the ground. If you’re not confident you can safely lift and remove a toilet, you’ll need a helper on hand to help shoulder the weight.
The first step is to remove the caps from the bolts that secure the toilet's base to the floor. In most cases, there will be two of them on each side of the bowl. Use a screwdriver to pry off the caps, and then use the wrench to loosen and remove the nuts from the bolts. Set them aside for later.
Once you have removed the nuts, grab each side of the commode and gently rock it back and forth until it’s loose and the seal of the wax ring beneath the base breaks.
The bowl is now ready to lift. Straddle the toilet and crouch, reaching down until you have a grip on the underside of the bowl. Stand steadily and slowly, lifting with your legs, until the bowl is off the bolts. Set it down on its side on top of your tarp.
Unscrew the Mounting Bolts
Most likely, you’ll find that the flange mounts to the floor with four screws. Insert your screwdriver and turn each screw counterclockwise until it’s loose enough to remove. If the hardware is in good shape, you can set the pieces aside to reuse with your new flange.
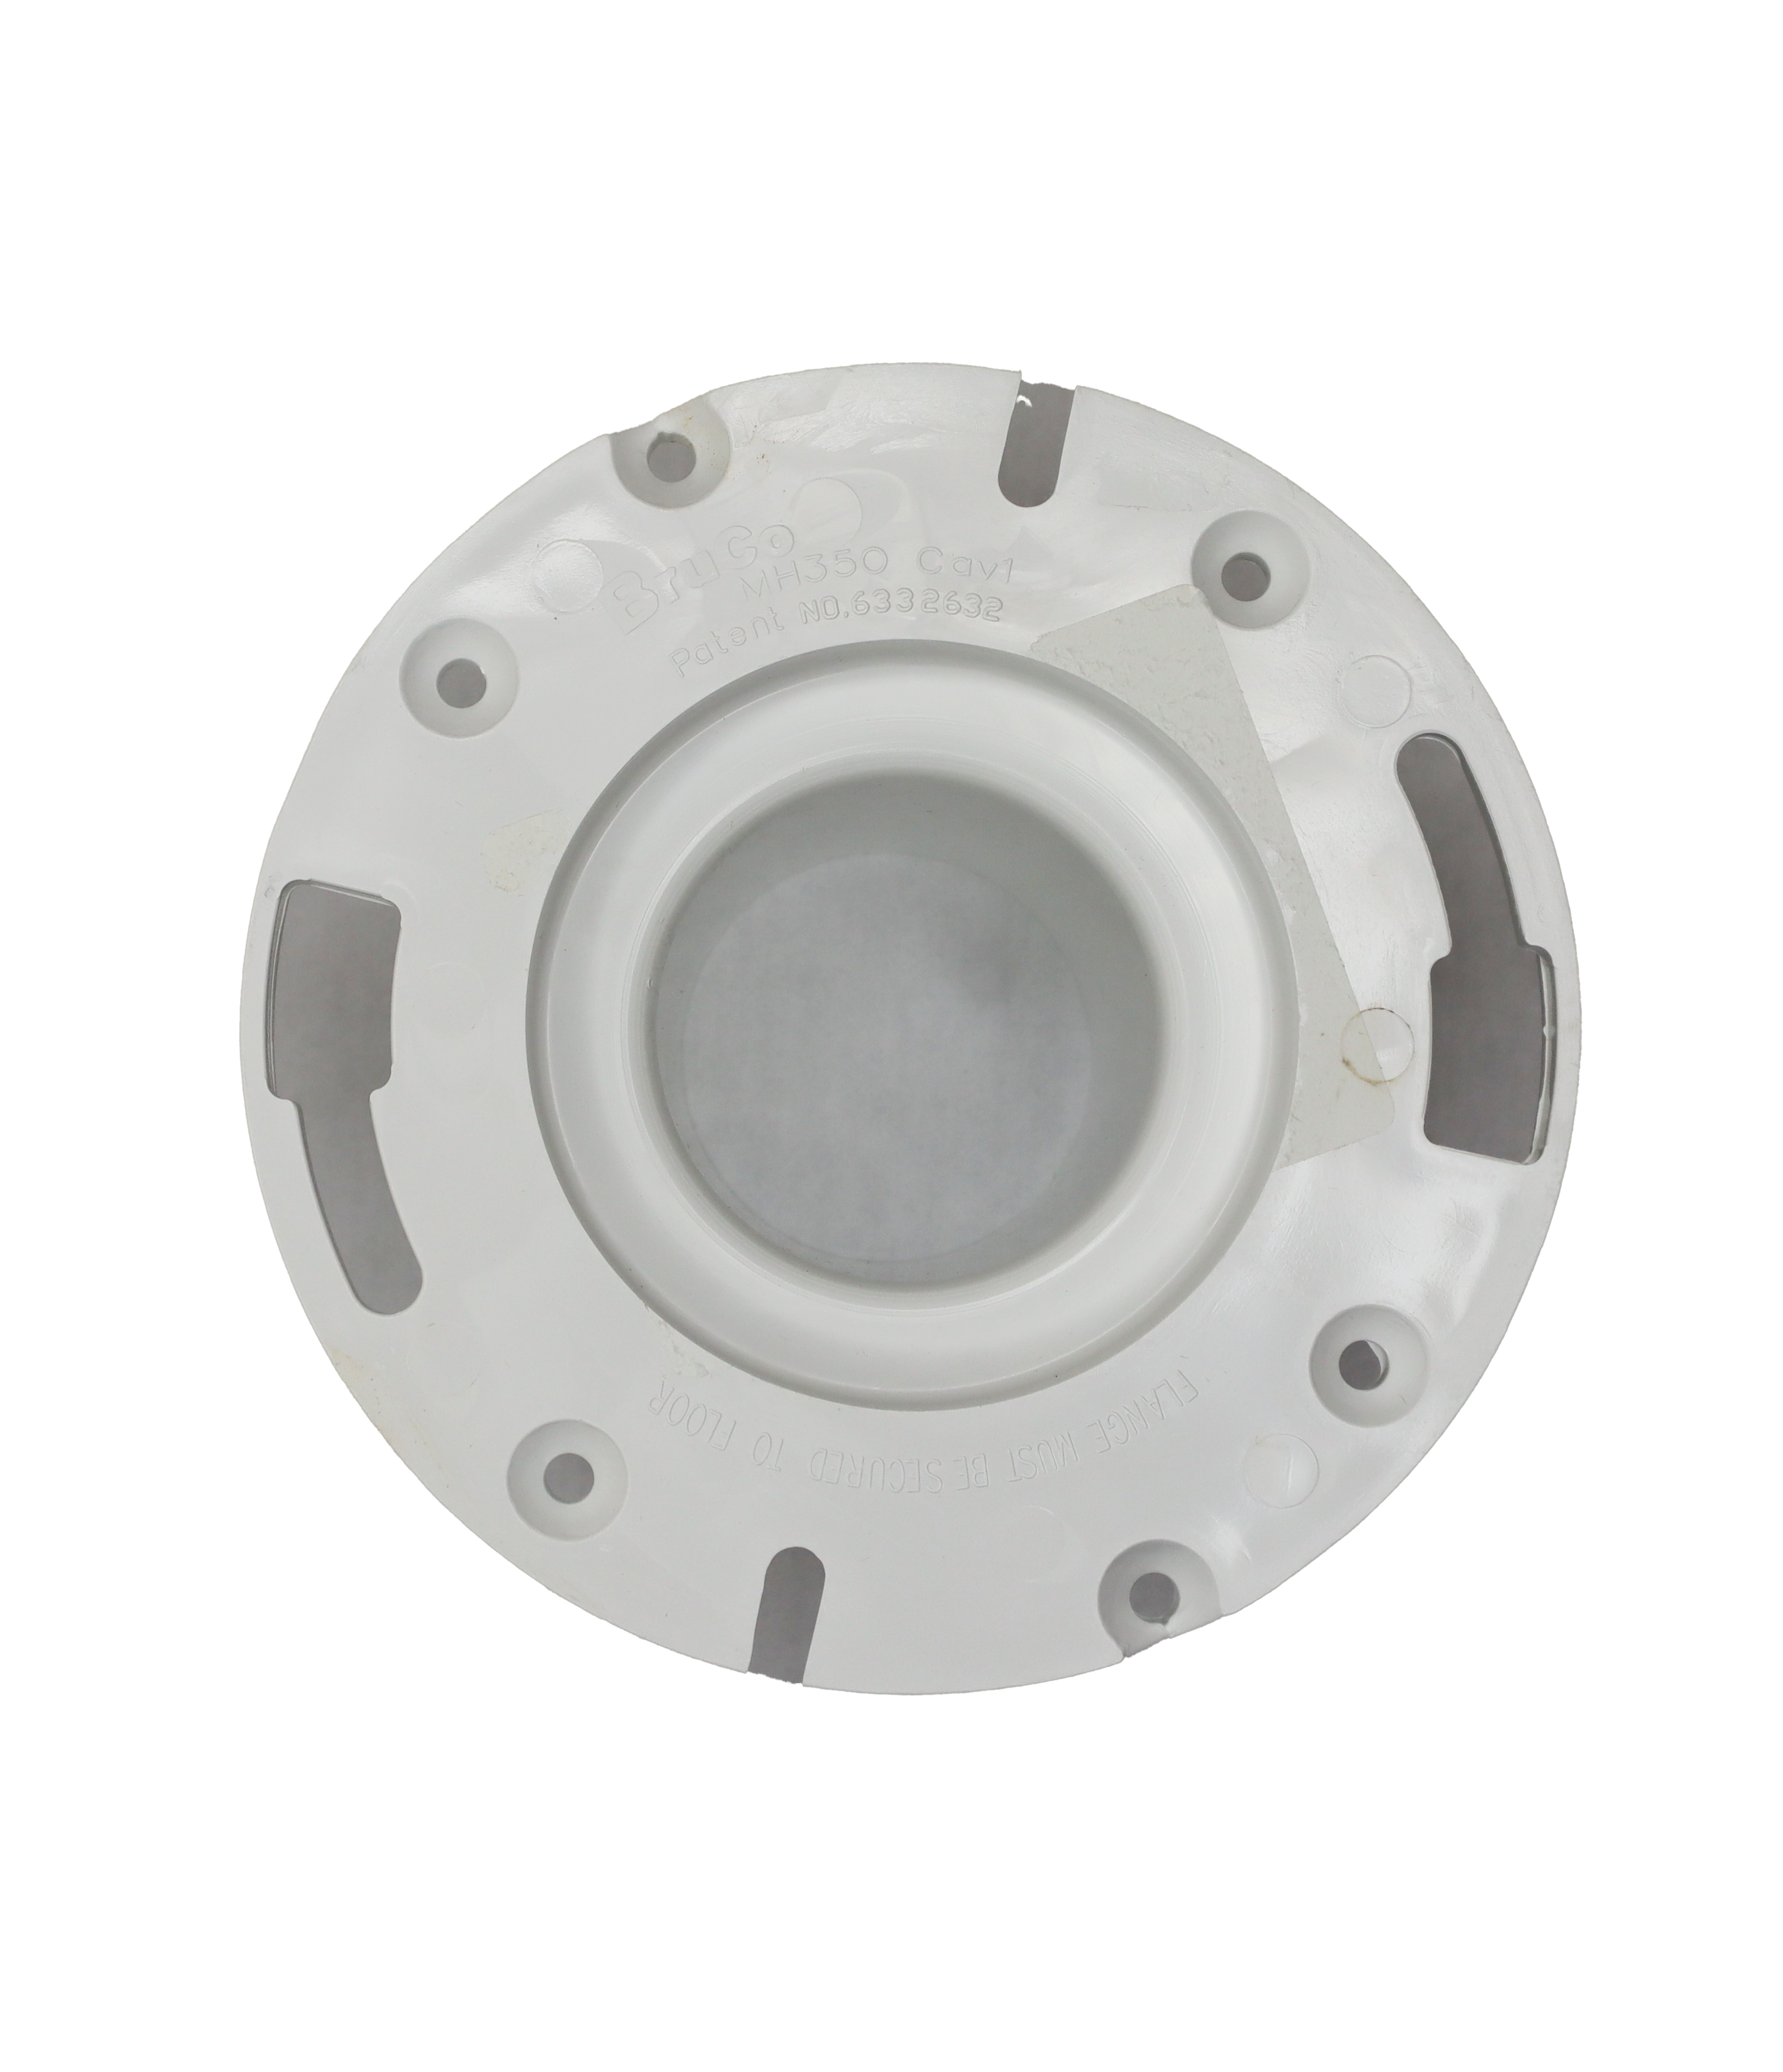
Lift the Flange to Remove
The flange is a circular fitting (2 to 3 inches in diameter) that sits underneath the toilet; it connects the internal drainage system to the drainpipe while securing the base of the toilet to the floor. Most toilets feature a PVC flange sealed with a gasket. If yours does, with the wax ring scraped away and the bolts loose, you can simply lift it up from the drainpipe and set it aside.
Toilet flanges do, however, come in various materials and can feature different fitting types. If you reach this stage and it turns out you have a metal flange glued in place or attached with a deep-seal fitting, you’ll need to stop and hire a plumber to take care of the rest of the job.
Otherwise, you can risk damaging the drainpipe—a significantly more expensive and complicated problem to address.
Before moving on to the next step, take the opportunity to examine the subfloor around your toilet. If any patches are soft or spongy, you should call a pro to quote the price to replace the damaged subflooring before proceeding further.
Measure the Outflow Pipe
Before installing a toilet flange, you’ll need to make sure you’ve got the right size. One option is to bring the old flange to the hardware store to find a match. Otherwise, you’ll want to take some measurements.
Before jumping into how to change a toilet flange, use the measuring tape to determine the diameter of the old flange, double-checking to confirm you’ve done it right. Make sure to buy a flange that matches the size, shape, and material of the old one—as well as a new wax ring if there isn’t one in your new flange kit.
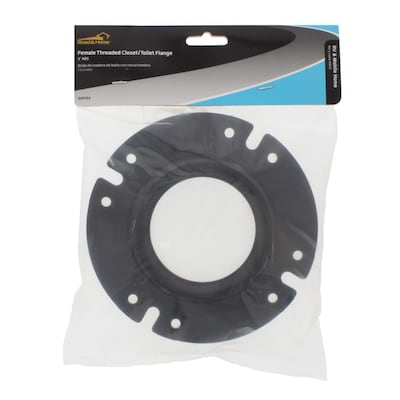
Fit and Install the New Toilet Flange
Once you’ve got an appropriately-sized new flange, it’s time to start setting the new toilet flange. Remove and throw away the rags or towel from the outflow pipe.
Fit the new flange snugly into the outflow pipe, creating a seal with the gasket and resting the outer lip flush to the floor. Using the included hardware, secure the flange to the subfloor with screws and slide on the toilet flange bolts. Remember to tighten the washers or nuts fully.
Add the New Wax Ring
There are two different ways to install the new wax ring: Securing it either to the flange or to the toilet base. The latter is the preferred option among pros and the better choice if you have the space and muscle to do so. With the commode lying on its side on the floor or tilting it upward, attach the replacement wax ring directly to the hole at the bottom and ensure it’s fitted correctly.
If attaching it to the toilet seems too tricky, you can simply place the wax ring on the flange, centering it around the hole.
Replace the Toilet Completely
With the replacement flange in place, all you need to do is reassemble the toilet. Lift the toilet from the floor—making sure to engage your leg muscles to avoid straining your back—and place it on top of the new flange. Be sure to line up the holes at the base with the flange bolts. Once it’s resting evenly, apply steady downward pressure from the top of the bowl to seal the wax. Be careful not to rock or wobble it so that you don’t break the seal.
With the hardware you set aside, secure each of the bolts on the bowl with the nuts and washers—turn them tightly enough to prevent the toilet bowl from wobbling but be careful not to over-tighten them and risk cracking the porcelain. Then replace the bolt caps.
Next, lift the tank and place it back on the bowl, aligning the bolts with the holes. With the nuts you set aside, tighten the bolts until the bowl and tank are evenly and securely aligned. Reattach the supply hose to the toilet tank. Slowly turn the valve to gradually open it, testing for leaks as water begins to flow back into the toilet. Once the tank has filled, flush the toilet and keep an eye on the base, making sure there’s no leakage at the base of the toilet.
https://www.angi.com/articles/how-to-replace-toilet-flange.htm
Do you enjoy reading about How to Replace a Toilet Flange? Put feedback down below. We'd be delighted to hear your views about this piece. In hopes that you come back again later on. Sharing is good. You won't know, you may just be doing someone a favor. I recognize the value of your readership.
Details Here Report this page